How to Set Up MuLogin Browser Proxy With IPRoyal

Milena Popova
Last updated -
In This Article

Ready to get started?
The key purpose of anti-detect browsers is to help businesses and individuals manage multiple accounts on various online platforms. Social media agencies, e-commerce managers, advertisers, dropshippers, and others can benefit from these solutions. On top of that, anti-detect browsers are very popular among developers, web scrapers, and website testers due to their excellent customization capabilities.
System information, user agents, browser settings and extensions, cookies - managing all this information manually is nearly impossible. An anti-detect browser can handle all of it automatically or with just a few clicks.
In this article, we’ll go over setting up a MuLogin proxy with IPRoyal!
What Is the MuLogin Browser?
MuLogin allows users to create an unlimited number of browsers, each with a unique fingerprint, cookies, storage, and cache. All profiles are completely isolated, without a chance of leaking information, ensuring secure multi-accounting and minimizing chances of detection.
Unlike some other browsers, MuLogin doesn’t prevent websites from reading your browser fingerprint. Instead, it replaces your original fingerprint with a different one. The browser is team-oriented, with support for sub-accounts, team members, permissions, fingerprint sharing, and cloud synchronization.
Setting up and customizing different browser fingerprints can only get you so far, though. It’s all pointless if all your activity comes from a single IP address. To ensure maximum privacy and smooth operation, it’s essential to combine MuLogin with reliable residential proxies . This is where IPRoyal comes into the picture.
Why Use IPRoyal as Your MuLogin Browser Proxy Provider?
There are a few key reasons why IPRoyal’s residential proxies are a perfect choice for MuLogin. All IP addresses in our residential proxy pool come from genuine devices with real residential internet connections. In other words, each browser profile you create in MuLogin will be indistinguishable from real internet users. Aside from authenticity, our residential proxies offer a few other advantages:
- Global proxy pool (195+ countries)
- Precise geo-targeting (country, state, and city level)
- Non-expiring residential proxy traffic
- Pay-as-you-go pricing (no contracts or monthly limits)
- Advanced IP rotation control (in seconds, minutes, hours, or days)
- Competitive pricing and great bulk discounts
Setting up a MuLogin Browser Proxy With IPRoyal
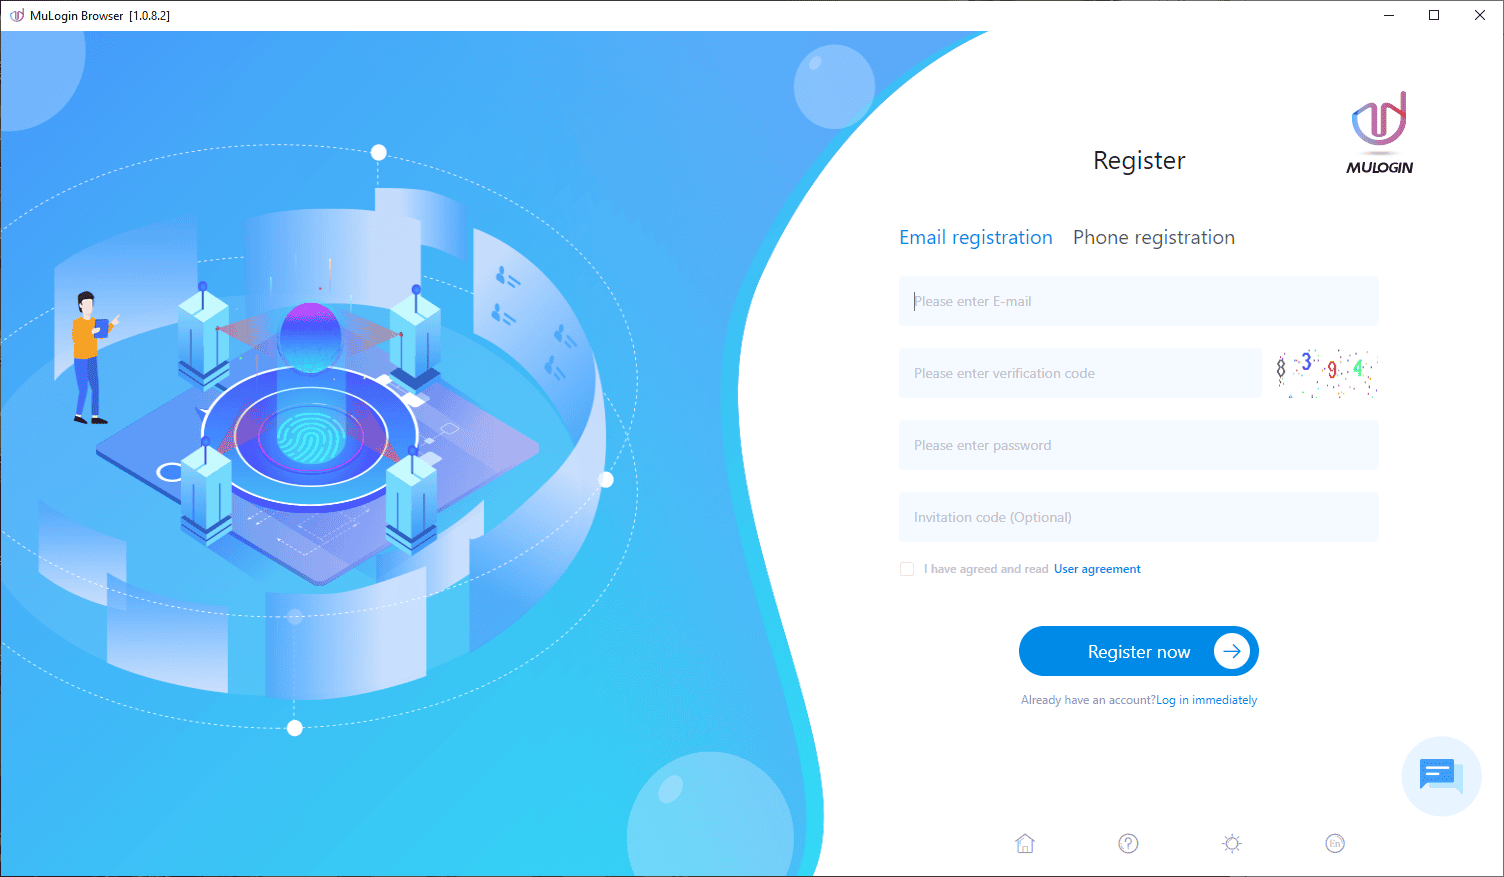
To get started, download the latest version of MuLogin and install it. Once you run it for the first time, you can create an account and start using your 3-day free trial .
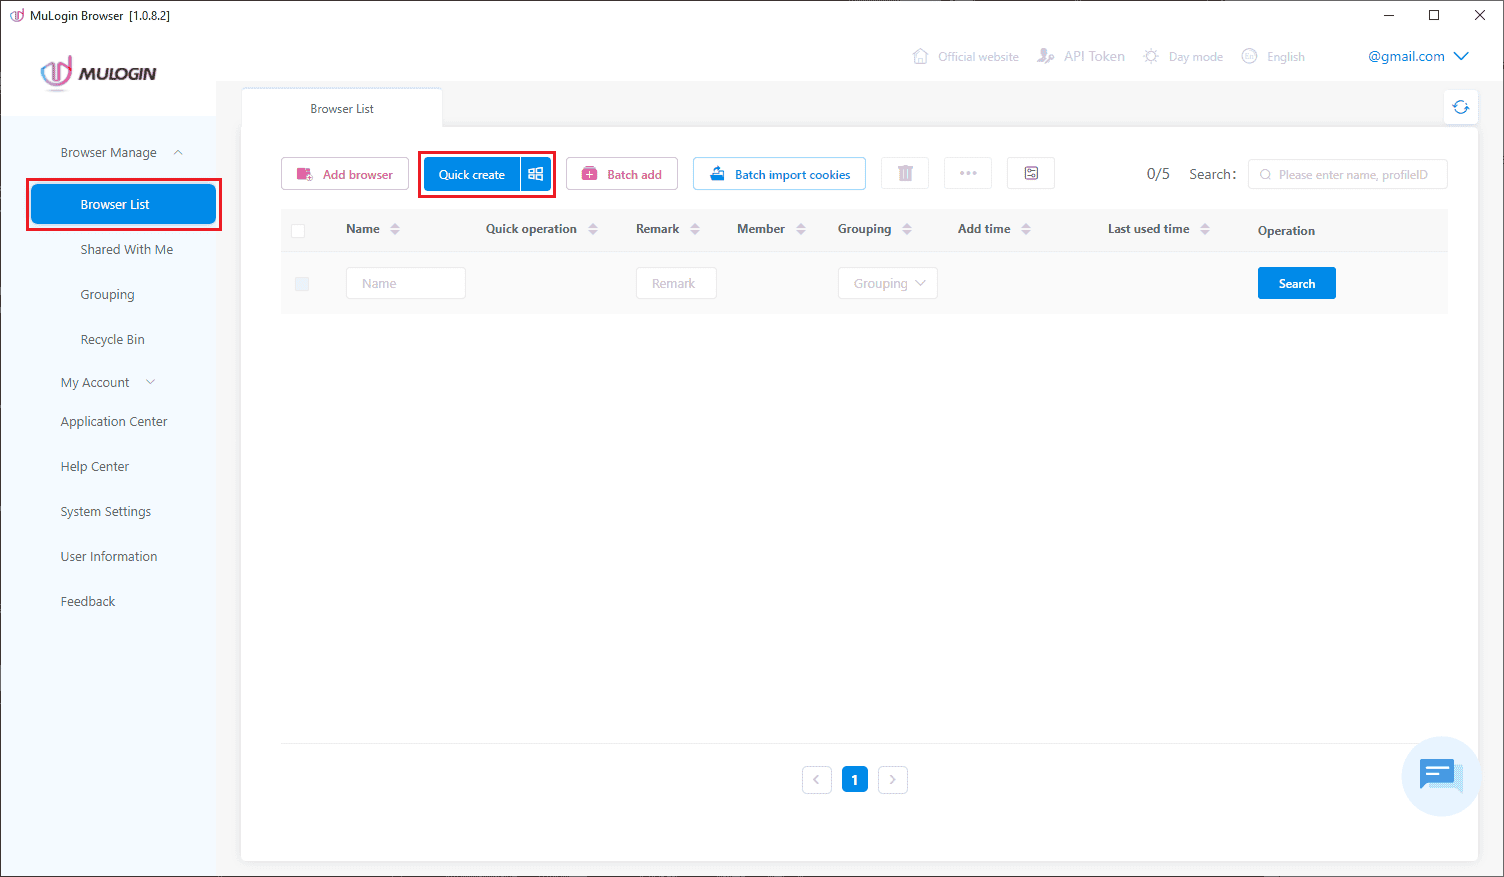
To add a browser profile, navigate to the Browser List section on the left and click the Quick Create button.
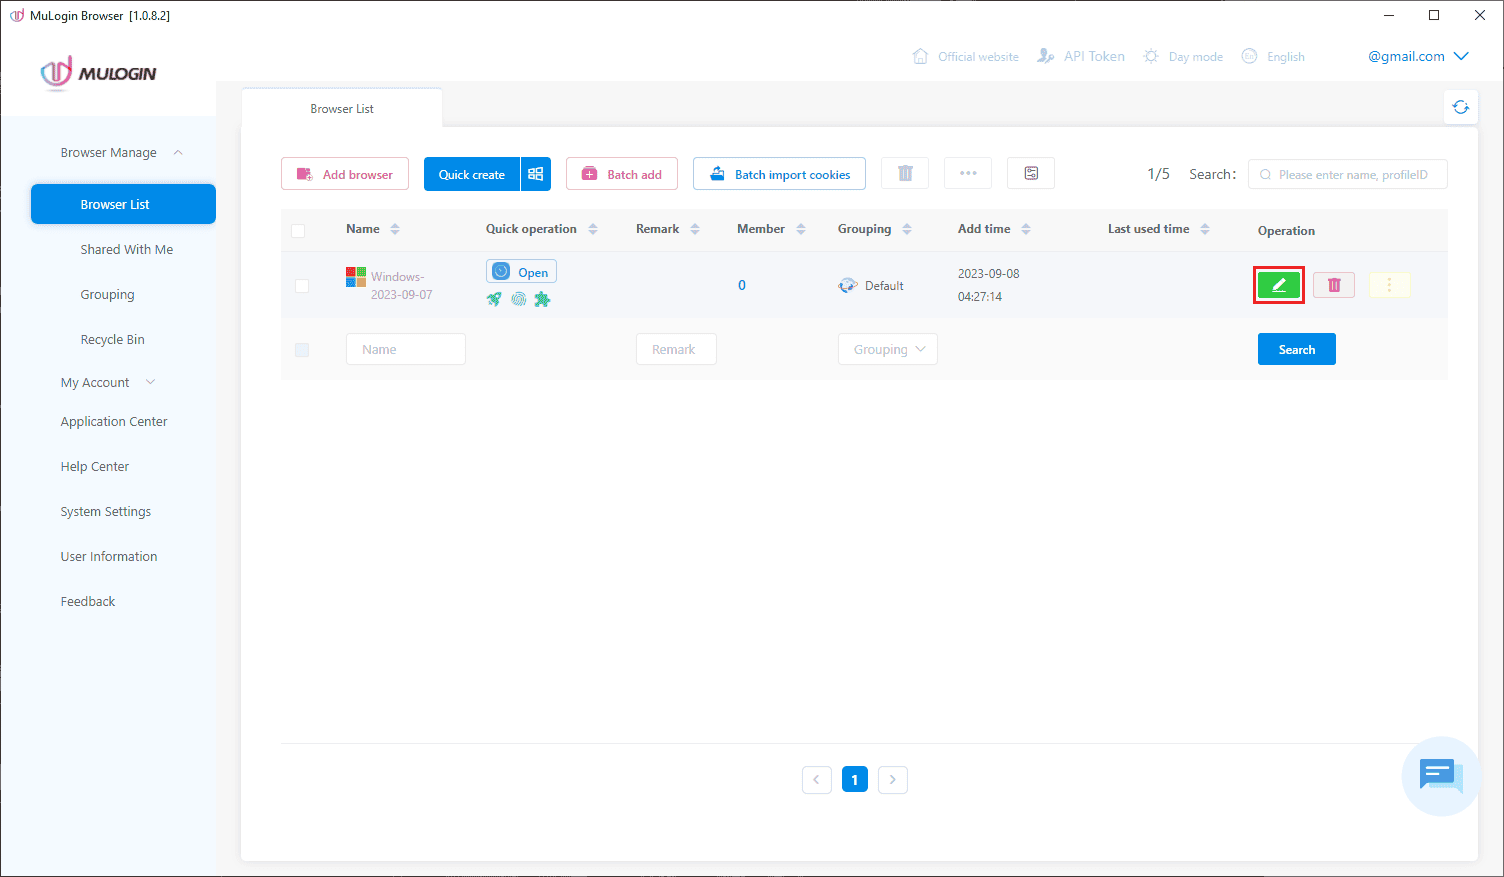
MuLogin will create a browser profile for you, and you can customize every aspect of it by clicking the pen icon to the right.
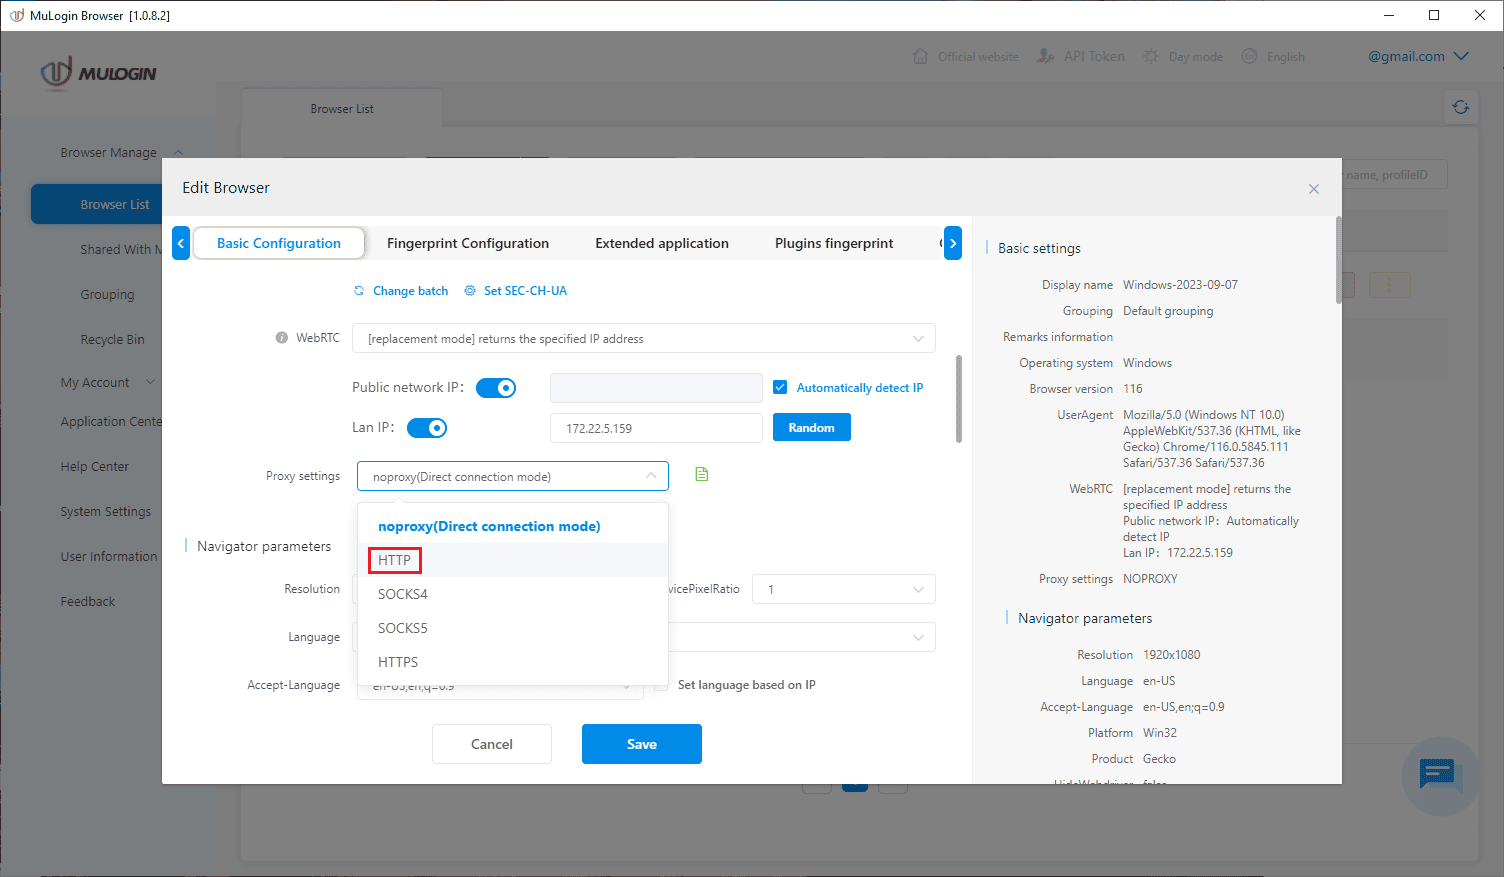
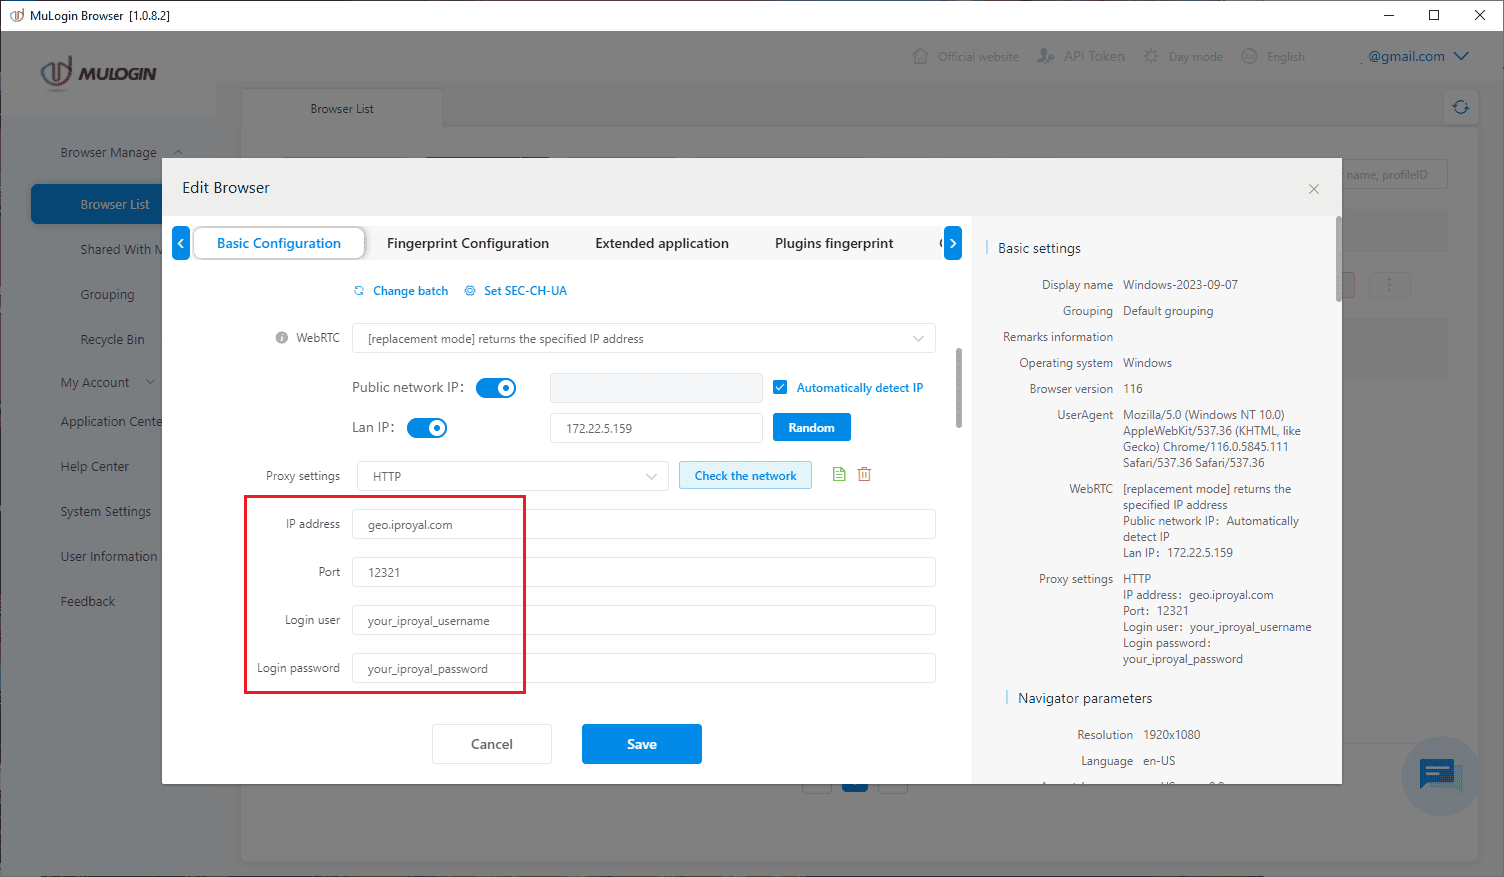
To add proxies to your browser profile, make sure you’re in the Basic Configuration tab. Scroll down to Proxy settings .

Click on the drop-down menu and select the type of proxy server you want to use. For the purpose of testing, we’ll go with HTTP .
Now, it’s time to open the IPRoyal dashboard . Let’s say we want to use rotating proxies from Paris, France, with sessions that last two hours. Since we chose HTTP in MuLogin, we’ll select HTTP/HTTPS in the IPRoyal dashboard.
Note that IPRoyal proxies also support SOCKS5 , which is one of the available options in MuLogin.
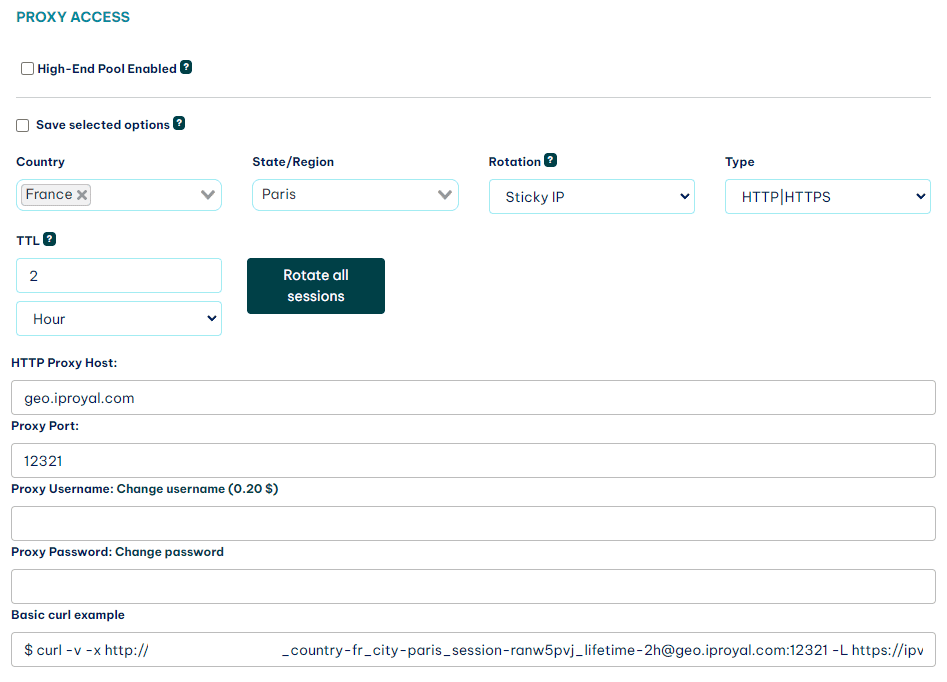
Once you configure your proxies, copy the following information:
- HTTP Proxy host to the IP address field;
- Proxy port to the Port field;
- Proxy Username to the Login user field;
- Proxy Password to the Login password field
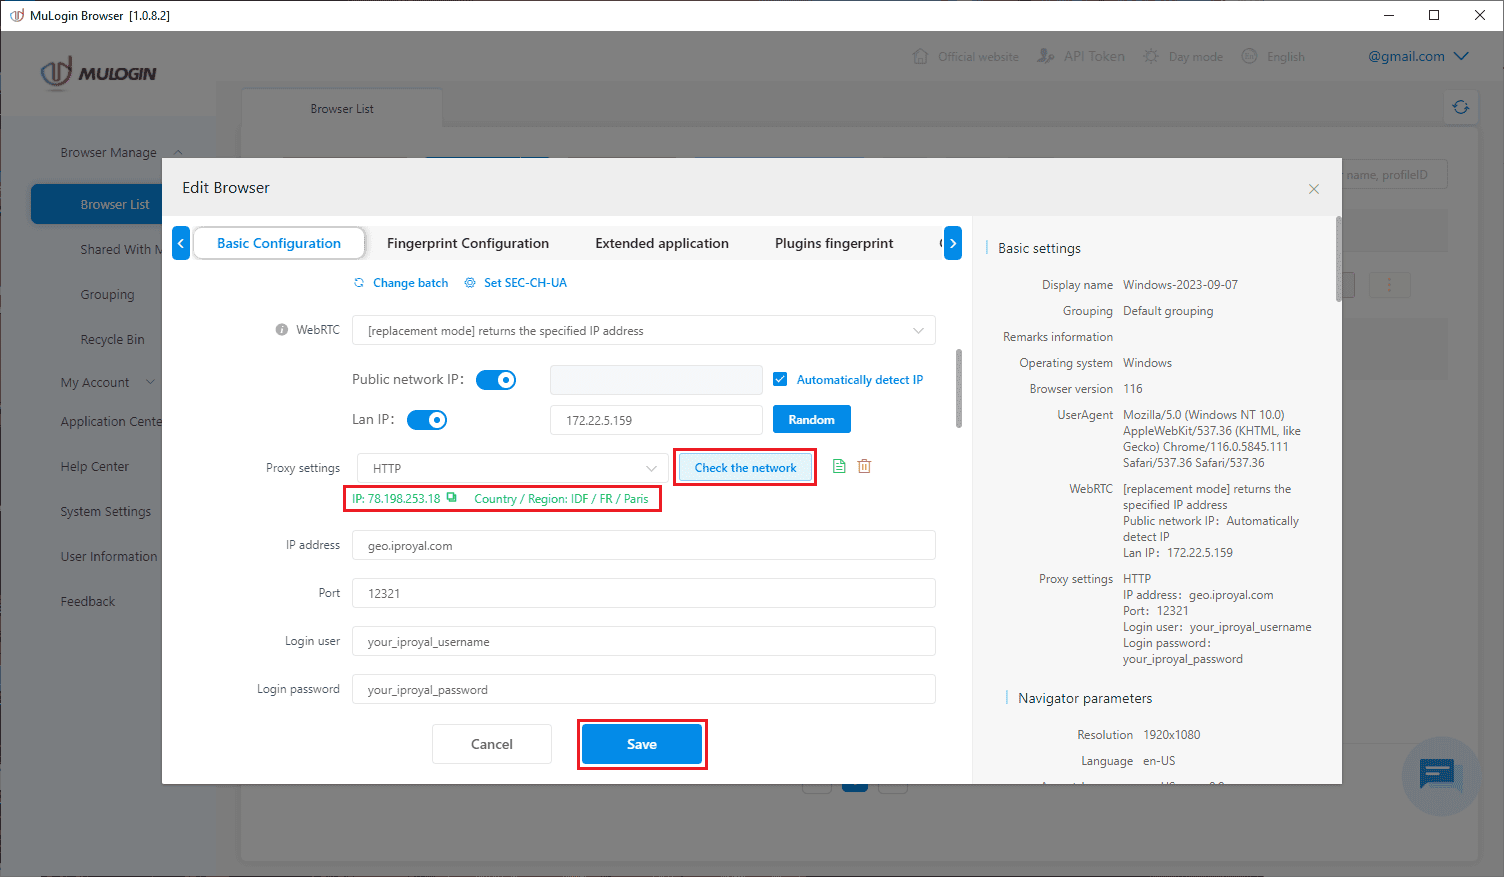
Click the Check the network button to test your proxy. You’ll see the current IP address and the location of your proxy. If that’s the case, click the Save button at the bottom of the window.
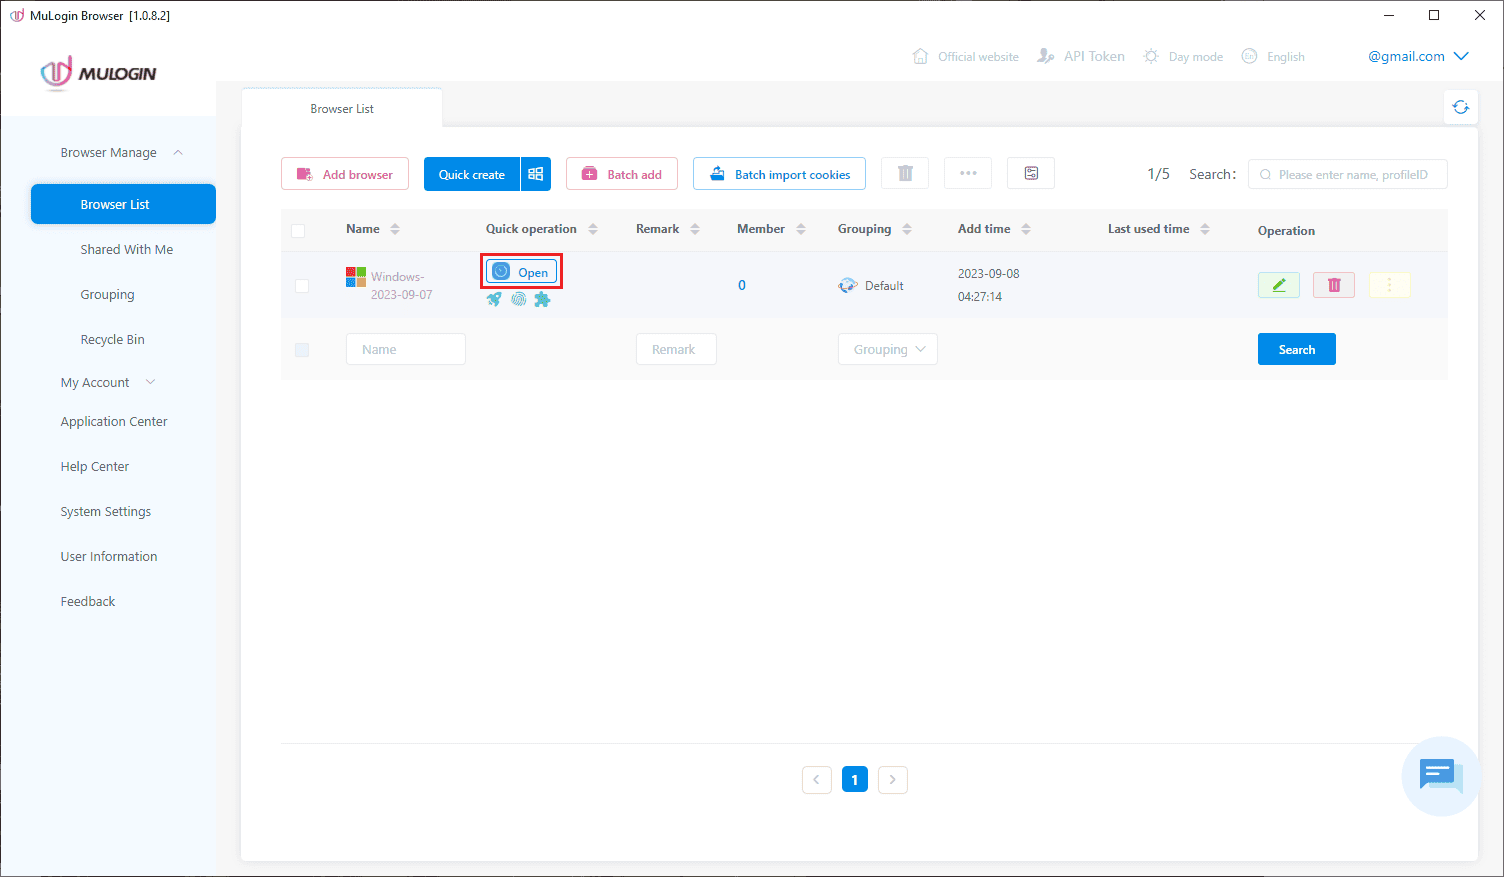
Now it’s time to open your custom browser by clicking the Open button in the Browser List .
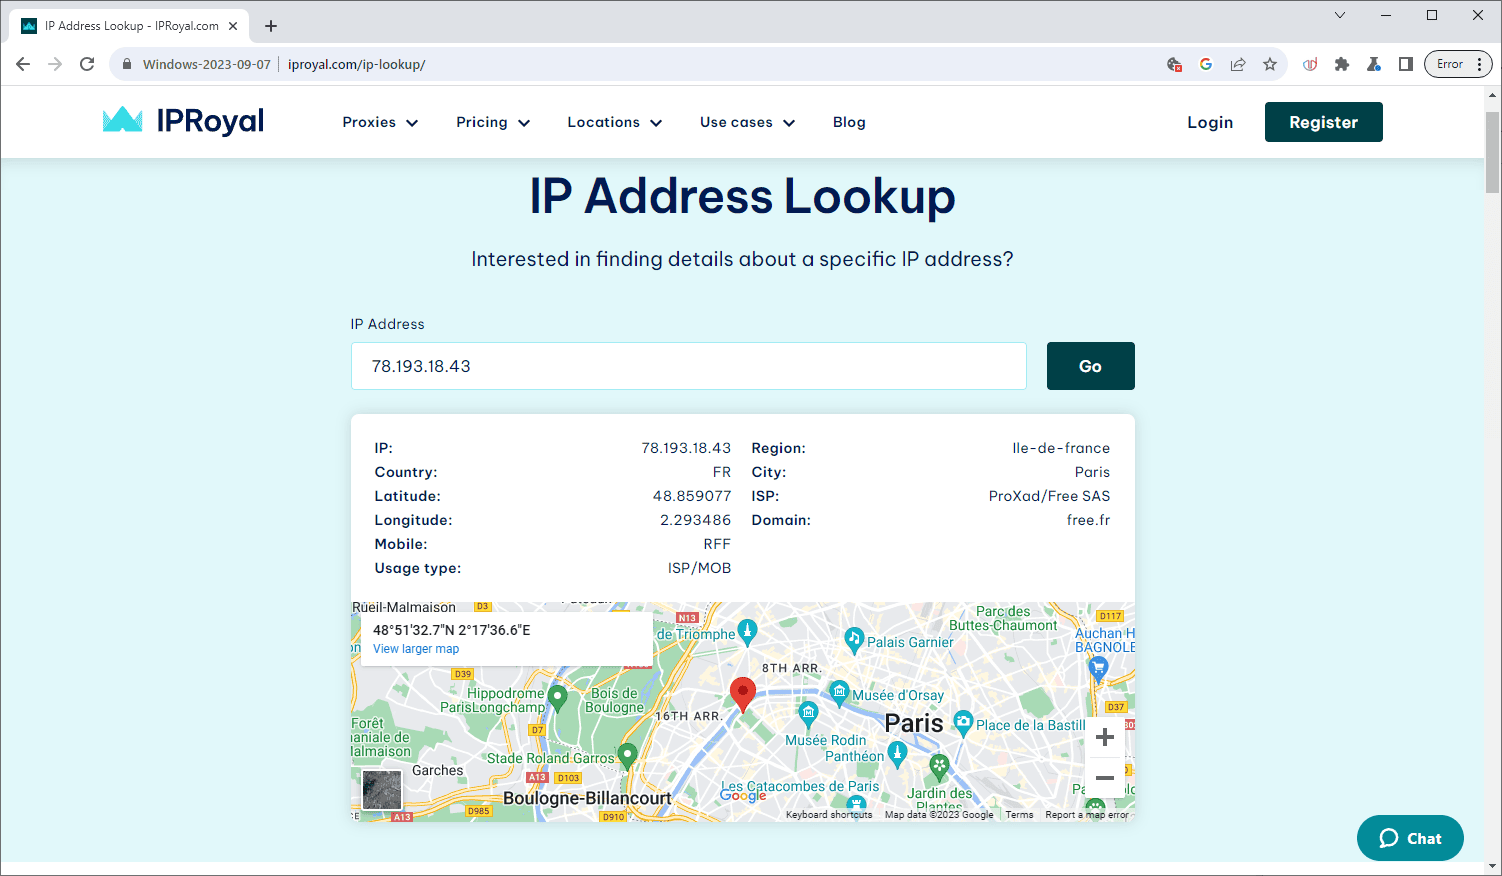
If you want, you can visit our IP Address Lookup page to check your proxy’s IP address, location, ISP, and more.
Congratulations, you’re ready to go! If you remember, we used the IPRoyal dashboard to create two-hour sessions. You can generate up to 10,000 unique proxy sessions with IPRoyal and create as many browser profiles as you want , each with a unique IP address from a location of your choice. All you need to do is add your proxy credentials from the dashboard to MuLogin, as described above.
Final Thoughts
MuLogin offers some great features we haven’t seen in other options on the market. Once you set up your MuLogin proxy with IPRoyal, you can take advantage of a free 3-day trial and test it out without worrying about bans, blocks, or other limitations!
Author
Milena Popova
Content Writer
With nine years of writing experience, Milena delivers exceptional content that informs and entertains readers. She is known for her reliability, efficiency, and cooperative nature, making her a valuable team player. Milena’s passion for IT and proxy networks fuels her content creation, ensuring accessibility for all. Outside of work, you’ll find her reading a good book or keeping up with the ever-evolving world of IT.
Learn more about Milena Popova