Web Scraping With Puppeteer and Node.js


Justas Vitaitis
Last updated -
In This Article

Ready to get started?
JavaScript libraries like Axios and Cheerio are useful for scraping simple websites. But since they only work with HTML, they don’t let you interact with dynamic websites that use JavaScript.
To interact with dynamic websites, you need a tool that can emulate a browser and execute JavaScript that’s on the page.
One of these tools is Puppeteer, a library created by a team from Google that provides a useful and convenient high-level API for controlling the browser.
This article will introduce you to Puppeteer and show you how to use it to scrape the top videos for a given keyword on YouTube.
What is Puppeteer?
Puppeteer is a browser automation tool that allows developers to control a browser via code. It’s commonly used for testing web applications, but web scrapers can also use it to simulate actions done by a real browser and scrape information.
It provides a high-level JavaScript API over the Chrome DevTools protocol , which is a set of tools for debugging Chrome and Chromium browsers.
With it, you can automate almost any action that you can do in a browser. For example, you can use it to interact with elements like forms and buttons, scroll the page, type, and execute JavaScript functions.
By default, it uses the Chromium browser, but it can also be configured to use Chrome or Firefox.
Tutorial: Using Puppeteer to Scrape YouTube
In this tutorial, you’ll learn how to use Puppeteer to write a script that scrapes the top videos for a search keyword on YouTube. The script will take a list of keywords and, for each keyword, return the names and links of the videos displayed.
After that, you’ll learn how to add a proxy to the script to mask your scraping activities.
Setup
For this tutorial, you’ll need to have Node.js installed on your computer. If you don’t have it yet, you can use the official instructions to download and install it.
First, create a new folder called puppeteer_tutorial, move to it, and initialize a new Node.js project.
It can be done with the following sequence of commands:
mkdir puppeteer_tutorial
cd puppeteer_tutorial
npm init -y
Then install the puppeteer package for Node.js with the following command. It will also download a dedicated browser that the library will use.
npm i puppeteer --saveNow you’re ready to work with Puppeteer. Create a new file called index.js and open it in your favorite code editor to get started.
Opening a Page in Puppeteer
Here’s a basic Puppeteer script example.
const puppeteer = require('puppeteer');

(async () => {
  const browser = await puppeteer.launch({
    headless: false,
    defaultViewport: null
  });

  const page = await browser.newPage();
  await page.goto('https://www.youtube.com/');
})();
The script above launches Puppeteer, opens a new browser tab, and goes to YouTube’s main page.
Because of the headless:false option provided to the puppeteer.launch() function, the browser renders everything graphically while the actions are taken. This is great for learning the library and debugging your code. For real scripts, it’s better to disable that option to save resources.
To run the script, copy it to index.js, save it, and run the following command in the terminal:
node index.jsThis should open a new Chromium browser and connect to YouTube.
If you encounter a problem with running the browser at this stage, you can try to use the Troubleshooting section of Puppeteer docs to fix it.
In the next sections, you’ll improve this script to take actions such as clicking the search bar, typing, and scraping video names.
Closing the Cookie Banner
Now that the main page is open, you’re ready to do some scraping!
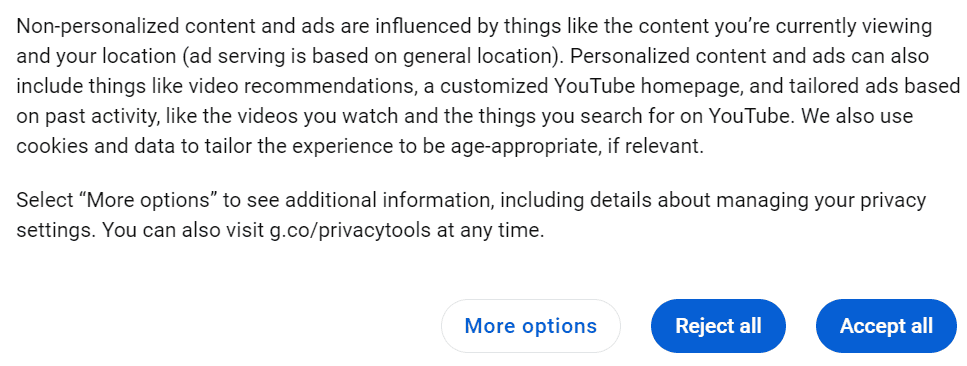
But first you need to get rid of that pesky cookie bar by clicking “Accept all”.
Like most web scraping libraries, Puppeteer enables you to select elements via CSS selectors . In addition, it also works with XPath selectors and a few more .
In this case, an XPath selector that targets the text of the button is the easiest to do. We can query the page with an XPath selector by providing it to the waitforXPath() method.
const cookieAccept = await page.waitForXPath('//span[contains(text(), "Accept all")]');This will search for a span element that contains the text “Accept all” and assign it to cookieAccept. After that, you can call the click method to click the element.
await cookieAccept.click();Finally, since clicking the cookie popup reloads the page, you should put a waitForNavigation() method. This will make the script take a pause while the page is loaded to ensure that the elements you want to work with are available.
await page.waitForNavigation({ waitUntil: 'networkidle0' });The waitUntil option specifies that it should wait until there are no active connections in the network for half a second (which means that the content of the page is loaded).
Here’s the full script for opening YouTube and closing the cookie banner.
const puppeteer = require('puppeteer');

(async () => {
  const browser = await puppeteer.launch({
    headless: false,
    defaultViewport: null
  });

  const page = await browser.newPage();
  await page.goto('https://www.youtube.com/');

  const cookieAccept = await page.waitForXPath('//span[contains(text(), "Accept all")]');
  await cookieAccept.click();
  await page.waitForNavigation({ waitUntil: 'networkidle0' });
})();
Using the Search Bar
After closing the cookie popup, you’ll want to type the phrase you want to search in the search bar at the top of the page and click the search icon.

First, you’ll need to find the search bar and select it. You can select the search bar by its id (which is search-input at the time of writing) using a CSS selector.
Here’s the function that does that:
const searchBar = await page.waitForSelector('#search-input');After that, you can use the .click() method to click the bar and the .type() method to type the phrase you want to search for:
await searchBar.click();
await searchBar.type('node.js');
Finally, you need to select the search icon and click it. It can also be selected by its ID, which is search-icon-legacy.
 const button = await page.waitForSelector('#search-icon-legacy');
  await button.click();
Clicking the search button will lead to videos loading. To wait for them, you can use the waitForNavigation method once again.
await page.waitForNavigation({ waitUntil: 'networkidle2' });Here’s how the script should look after update:
const puppeteer = require('puppeteer');

(async () => {
  const browser = await puppeteer.launch({
    headless: false,
    defaultViewport: null
  });

  const page = await browser.newPage();
  await page.goto('https://www.youtube.com/');

  const cookieAccept = await page.waitForXPath('//span[contains(text(), "Accept all")]');
  await cookieAccept.click();
  await page.waitForNavigation({ waitUntil: 'networkidle0' });

  const searchBar = await page.waitForSelector('#search-input');
  await searchBar.click();
  await searchBar.type('node.js');
  const button = await page.waitForSelector('#search-icon-legacy');
  await button.click();
  await page.waitForNavigation({ waitUntil: 'networkidle2' });
})();
This should result in a list of videos being displayed in the browser.

Scraping the Videos
All that’s left is to scrape the names and links of these videos.
To do that, you can use page.evaluate() , which enables you to evaluate JavaScript as if you had the console open while on the page. This will let you easily extract information out of HTML.
Here’s the function that extracts the titles and links of videos. If it looks a bit complicated, don’t worry, it’s explained step-by-step below.
  const data = await page.evaluate(async () => {

    let data = [];
    const titles = document.querySelectorAll('h3.ytd-video-renderer');

    for (const title of titles) {
      const titleText = title.textContent.trim();
      const titleLink = title.querySelector('a').href;

      const video = { title: titleText, link: titleLink };
      data.push(video);
    }

    return data;

  })
First, it initializes an empty array that will serve as a container for all the data you’ll scrape.
Then, it uses the querySelectorAll() method to find all H3s with the class of ytd-video-renderer. This selects all the titles of videos but not those of ads or playlists.
After that, the function iterates over those titles. It takes the textContent property of the titles and trims all the empty spaces. It also uses querySelector() to find the anchor tag that’s inside those titles and takes its href property—the property holding the link of the anchor.
Once it has those items, it constructs an object for each title and pushes it into the data array.
Finally, it returns the array, which gets assigned to a variable of the same name.
All that’s left to do is to console.log() the contents of the array and close the browser.
console.log(data);

await browser.close();
Here’s the full code for scraping videos for a given keyword on YouTube:
const puppeteer = require('puppeteer');

(async () => {
  const browser = await puppeteer.launch({
    headless: false,
    defaultViewport: null
  });

  const page = await browser.newPage();
  await page.goto('https://www.youtube.com/');

  const cookieAccept = await page.waitForXPath('//span[contains(text(), "Accept all")]');
  await cookieAccept.click();
  await page.waitForNavigation({ waitUntil: 'networkidle0' });

  const searchBar = await page.waitForSelector('#search-input');
  await searchBar.click();
  await searchBar.type('node.js');
  const button = await page.waitForSelector('#search-icon-legacy');
  await button.click();
  await page.waitForNavigation({ waitUntil: 'networkidle2' });

  const data = await page.evaluate(async () => {

    const titles = document.querySelectorAll('h3.ytd-video-renderer');

    let data = [];

    for (const title of titles) {
      const titleText = title.textContent.trim();
      const titleLink = title.querySelector('a').href;

      const video = { title: titleText, link: titleLink };
      data.push(video);
    }

    return data;

  })

  console.log(data);

  await browser.close();
})();
It should print out something like this:
[
  {
    title: 'Node.js Tutorial for Beginners: Learn Node in 1 Hour',
    link: 'https://www.youtube.com/watch?v=TlB_eWDSMt4'
  },
  {
    title: 'Node.js and Express.js - Full Course',
    link: 'https://www.youtube.com/watch?v=Oe421EPjeBE'
  },
  {
    title: 'Node.js Ultimate Beginner’s Guide in 7 Easy Steps',
    link: 'https://www.youtube.com/watch?v=ENrzD9HAZK4'
  },
...
Adding a Proxy
While many websites are fine with light web scraping, it’s a tight line. Doing extensive scraping (even by mistake) might lead to a timeout or an IP ban. And imagine not being able to access YouTube from your personal device.
That’s why it’s important to hide your IP address with a proxy . Proxies stand between you and the site you’re requesting from. They take your request and make it look like it originated from the proxy. If you do something that offends the administrators of the site, they will ban the proxy and not your real IP.
Proxy pools like IPRoyal residential proxies also help mask the fact that any scraping is going on. Since the IP is changed on every request, it looks like the site is visited by many persons and not one.
The tutorial assumes that you’re using IPRoyal proxies, but any other proxy provider should work with some adjustments. If you don’t have a proxy provider yet, you’re welcome to sign up for our residential proxies . For hobby usage, they cost less than a cup of coffee.
First, you need to make sure you have your proxy details on hand: server and port, and authentication - if applicable. If you’re using IPRoyal, you can find them in the dashboard.
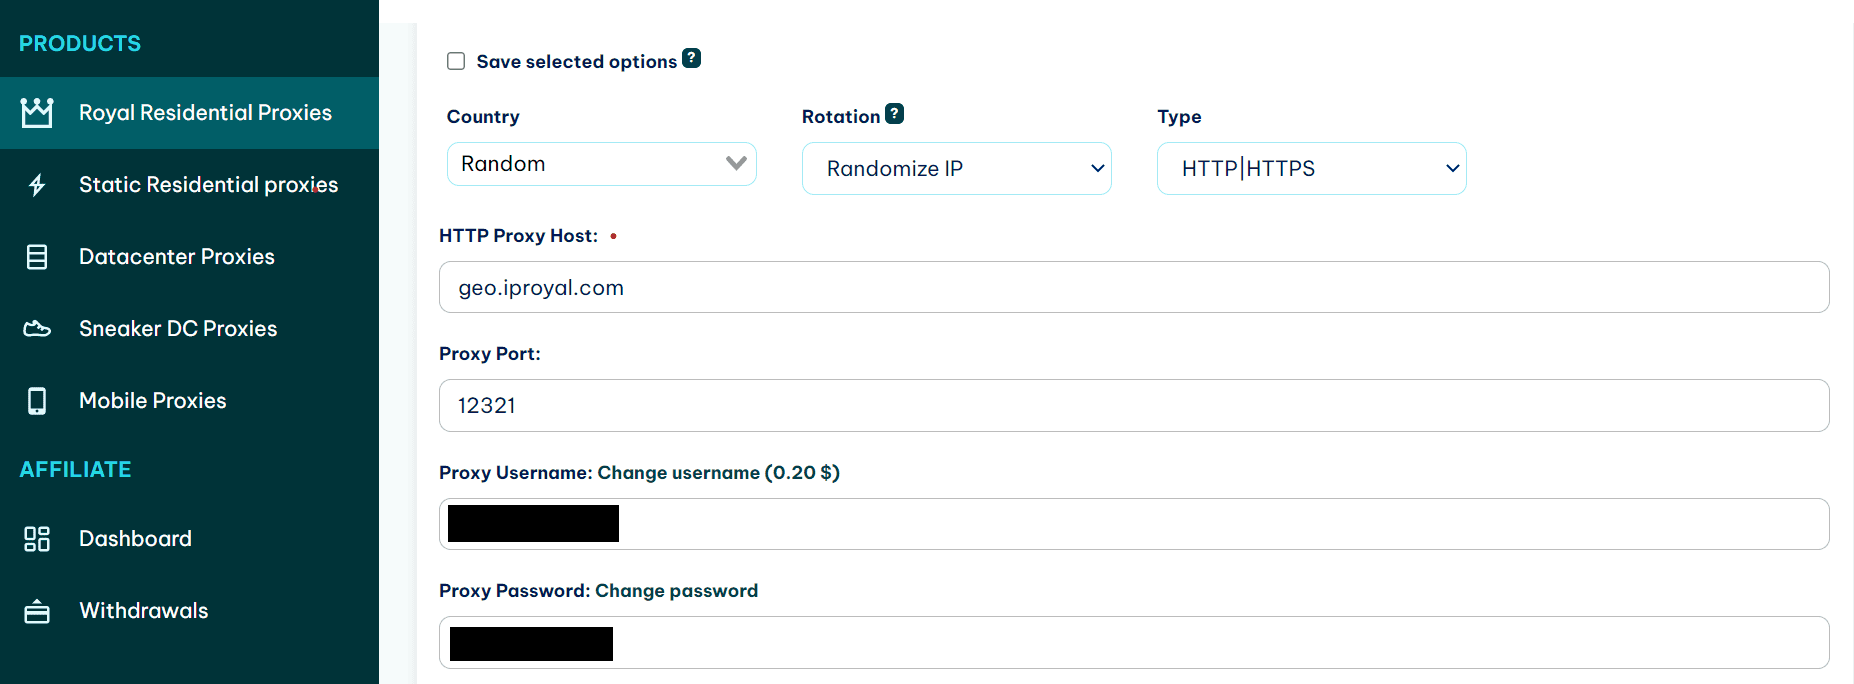
Adding a proxy to a Puppeteer script is easy. Add the following line to the puppeteer.launch() options. (Replace proxy_host and proxy_port with the real host and port.)
args: ['--proxy-server=proxy_host:proxy_port']
It should look something like this:
(async () => {
  const browser = await puppeteer.launch({
    headless: false,
    defaultViewport: null,
    args: ['--proxy-server=geo.iproyal.com:12321']
  });
If you’re using a paid proxy, you will also need to enter authentication details. This can be done with the page.authenticate() function. Put it right after the browser.newPage() function:
 const page = await browser.newPage();
  await page.authenticate({
    username: 'yourusername',
    password: 'yourpassword'
  });
This is how the code responsible for launching Puppeteer should look now that you’ve added proxies.
(async () => {
  const browser = await puppeteer.launch({
    headless: false,
    defaultViewport: null,
    args: ['--proxy-server=geo.iproyal.com:12321']
  });

  const page = await browser.newPage();
  await page.authenticate({
    username: 'your_username',
    password: 'your_password'
  });
...
Now YouTube won’t be able to ban your real IP address if they decide that they don’t like your web scraping activities.
Summary
In this article, you learned about Puppeteer, a browser automation library that can be used for web scraping purposes. Puppeteer can be used to execute most common user actions, such as clicking and typing. It can even evaluate JavaScript on the page.
If you want to practice more with the library, try using it with other dynamic websites such as Reddit or Twitter.
FAQ
The browser doesn’t launch when I run a Puppeteer script.
This can happen because of different reasons. If you get an explicit error, you might not have the browser available for use. Use the troubleshooting section of Puppeteer docs to try to solve this problem.
A common problem is that WSL (Windows Subsystem for Linux) cannot run the browser in headful mode. In this case, you need to use Chrome that is on Windows .
If you don’t get an explicit error, check if you are not launching Puppeteer in the headless mode. This happens by default, so you need to add headless: false to the launch options to have it display the actions it’s doing.
TimeoutError: Navigation timeout of 30000 ms exceeded
This error frequently happens when Puppeteer is waiting for an element that is not there or an action that won’t happen. An example of first is an incorrectly formed selector that’s used in the waitForSelector() function.
An example of second is waitForNavigation() with the waituntil:’networkidle0’ option that’s used for a page that’s repeatedly getting connections.
In both cases, it gets stuck and can’t move on until it hits a timeout.
Error: Evaluation failed: TypeError: Cannot read properties of null
This error frequently happens if there’s an issue somewhere in a chain of selectors. For example, if you are trying to access an element that’s not there, and then trying to access some property of that element. Check if your selectors are OK and if you haven’t made any changes elsewhere to invalidate those selectors.
Author
Justas Vitaitis
Senior Software Engineer
Justas is a Senior Software Engineer with over a decade of proven expertise. He currently holds a crucial role in IPRoyal’s development team, regularly demonstrating his profound expertise in the Go programming language, contributing significantly to the company’s technological evolution. Justas is pivotal in maintaining our proxy network, serving as the authority on all aspects of proxies. Beyond coding, Justas is a passionate travel enthusiast and automotive aficionado, seamlessly blending his tech finesse with a passion for exploration.
Learn more about Justas Vitaitis