How to Set Up a VMLogin Browser Proxy With IPRoyal


Milena Popova
Last updated -
In This Article

Ready to get started?
An anti-detect browser allows anyone to manage a virtually unlimited number of accounts on any website. That’s why these browsers are so popular among e-commerce managers, marketers, dropshippers, social media agencies, website testers, and others. But why is that so?
The most significant advantage of an anti-detect browser is advanced customization. Device and OS information, browser agents, settings, extensions, cookies - this information is impossible to manage manually. Anti-detect browsers provide control over all of it.
Today, we’ll talk about VMLogin (or Virtual Multi-Login) and setting up a VMLogin browser proxy with IPRoyal!
What Is the VMLogin Browser?
Just like any other robust anti-detect browser, VMLogin provides an environment to create, manage, and use multiple browser profiles. You can easily manage multiple accounts on any website from a single device without the website being able to get them linked and blocked.
Each browser profile has a unique fingerprint and completely isolated cookies, storage, and cache. It’s a significantly more convenient solution than using virtual machines or physical devices for this task.
Here are some key advantages of VMLogin:
- Isolated browser environments
Each VMLogin profile is a separate browsing environment, so cache, cookies, and other files can’t leak between profiles.
- Fingerprinting protection
VMLogin can easily replace multiple computers with virtual browser profiles, allowing users to manage them from a single device.
- Easy automation
You can automate VMLogin through Selenium or third-party automation tools like Browser Automation Studio.
- Team-friendly features
Teams can easily collaborate, share profiles, transfer functions, and more - all without any risk.
Why Use IPRoyal as Your VMLogin Browser Proxy Provider?
While VMLogin handles browser fingerprinting, you still need to use your proxies. If your browser profiles send all requests from the same IP address, you won’t get far. To ensure safe and reliable multi-accounting, you need reliable residential proxies. This is where IPRoyal can help.
Our proxies are ideal for VMLogin for one simple reason - each residential IP comes from a genuine device with a residential internet connection. Using these proxies will make all your VMLogin profiles indistinguishable from real internet users. Our proxies come with some additional advantages:
- Over 32 million proxies in 195 countries
- Country, state, and city-level geo-targeting
- Pay-as-you-go pricing with non-expiring traffic
- Precise IP rotation (from each request up to 7 days)
- Excellent price/value ratio and bulk discounts
Setting Up a VMLogin Browser Proxy With IPRoyal
To start using VMLogin, all you need to do is download it from their website. Click the Download button on the homepage and install the software. Once you run it for the first time, create an account.
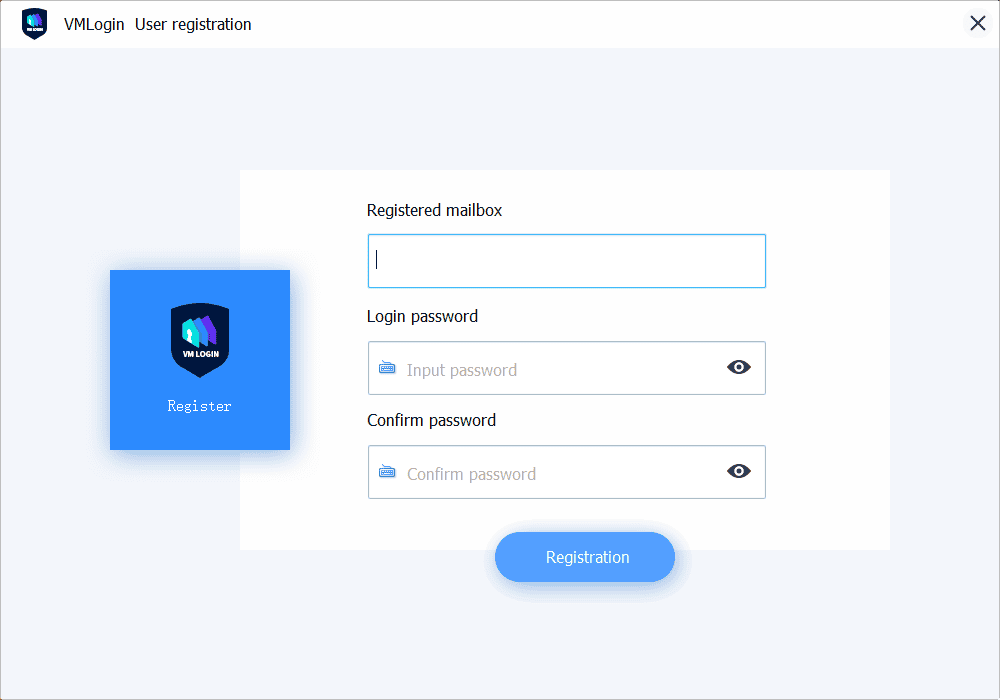
After you sign in, you can purchase a plan on the website or contact support to activate your 3-day trial. Once you get the confirmation email, you’re ready to start using VMLogin.

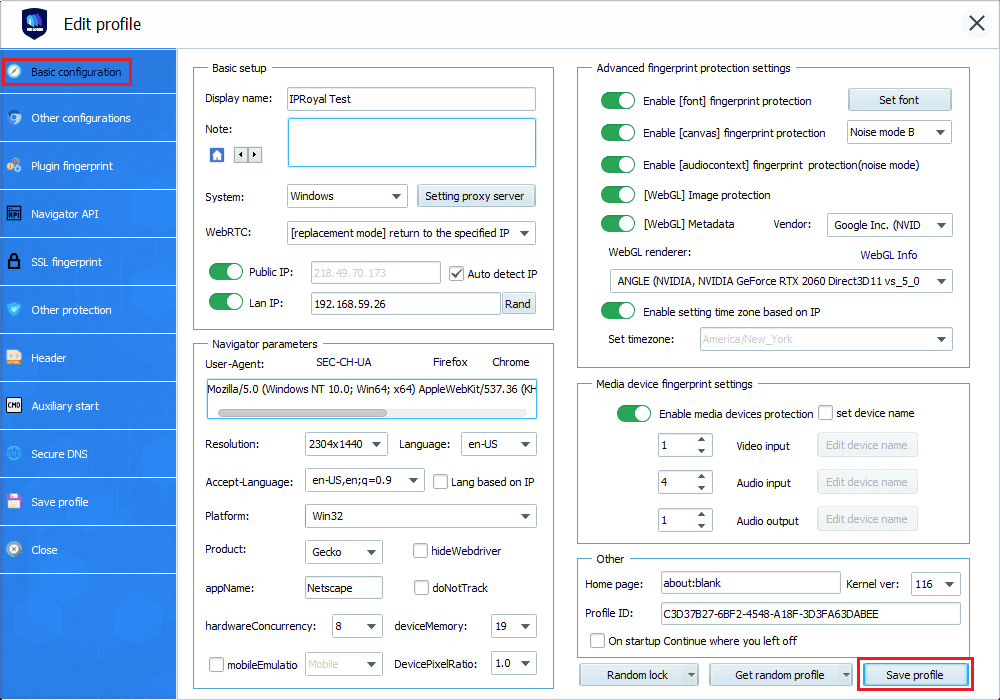
We’ll start by clicking on the New browser profile button. VMLogin will create a new browser for you, and you can control every aspect of it by navigating through the menu on the left. To set up proxies, click the Setting proxy server button in the Basic configuration tab.
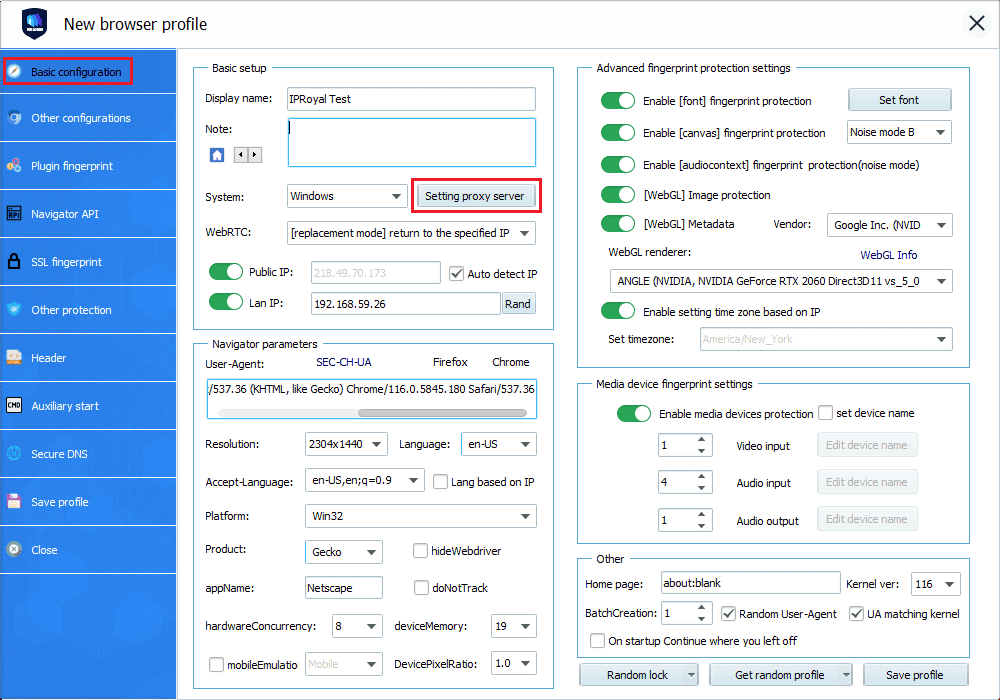
A new window will open, allowing you to use your credentials from IPRoyal.
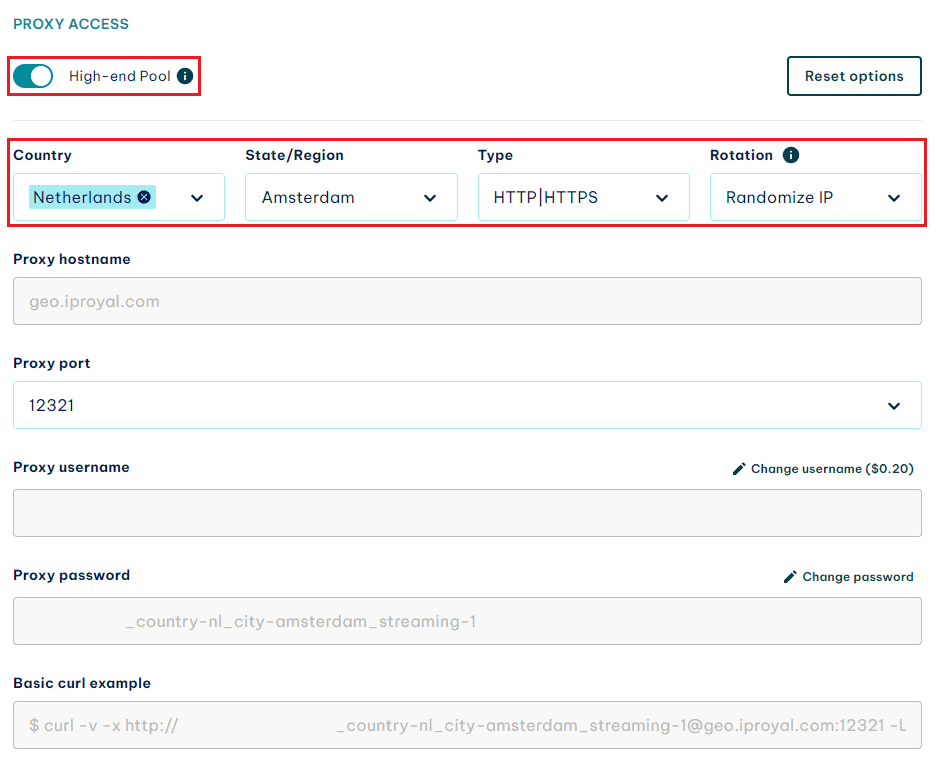
Before you do that, it’s necessary to configure your proxies in the IPRoyal dashboard. Let’s say we want to use high-end IPs from Amsterdam, Netherlands, that rotate on each request and use the HTTP protocol.
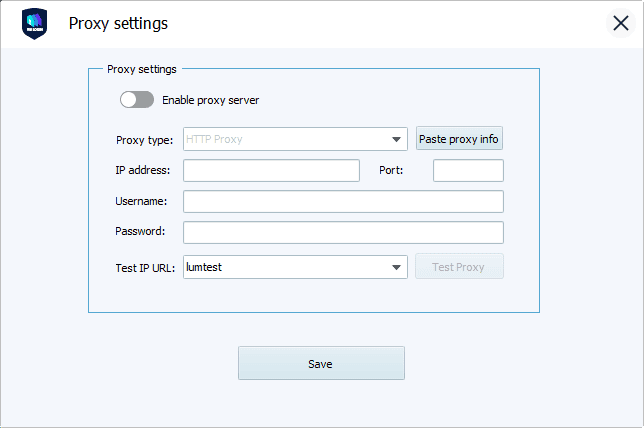
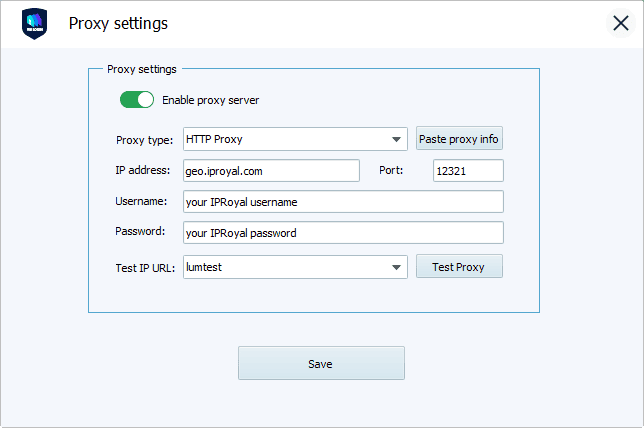
Once you’ve configured your proxies, copy the credentials from the IPRoyal dashboard to VMLogin as follows:
| IPRoyal | VMLogin |
|---|---|
| Proxy hostname | IP address |
| Proxy port | Port |
| Proxy username | Username |
| Proxy password | Password |
Make sure you tick the Enable proxy server box and select the right proxy type.
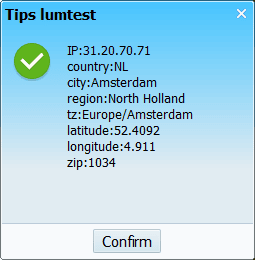
Use the Test Proxy button to check if your proxies work correctly. If you configured them properly, you’ll get a new window with proxy IP, its location, and more information.
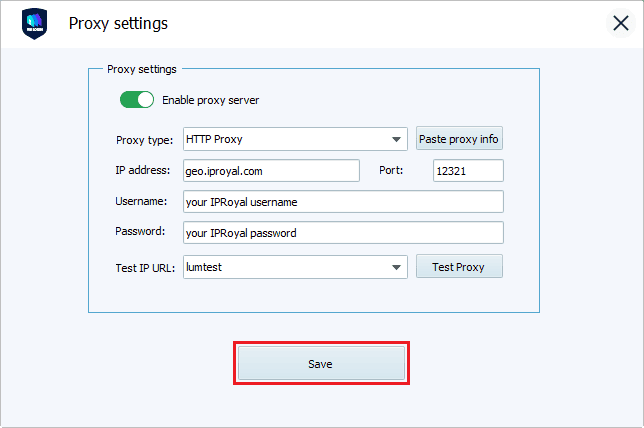
Close this window and click Save in the Proxy settings window.
Once you’re done configuring your browser profile, click the Save profile button in the Basic configuration tab.
Your new browser profile will show up in the Browser profile section. Right-click on it and select the Launch browser option from the drop-down menu.
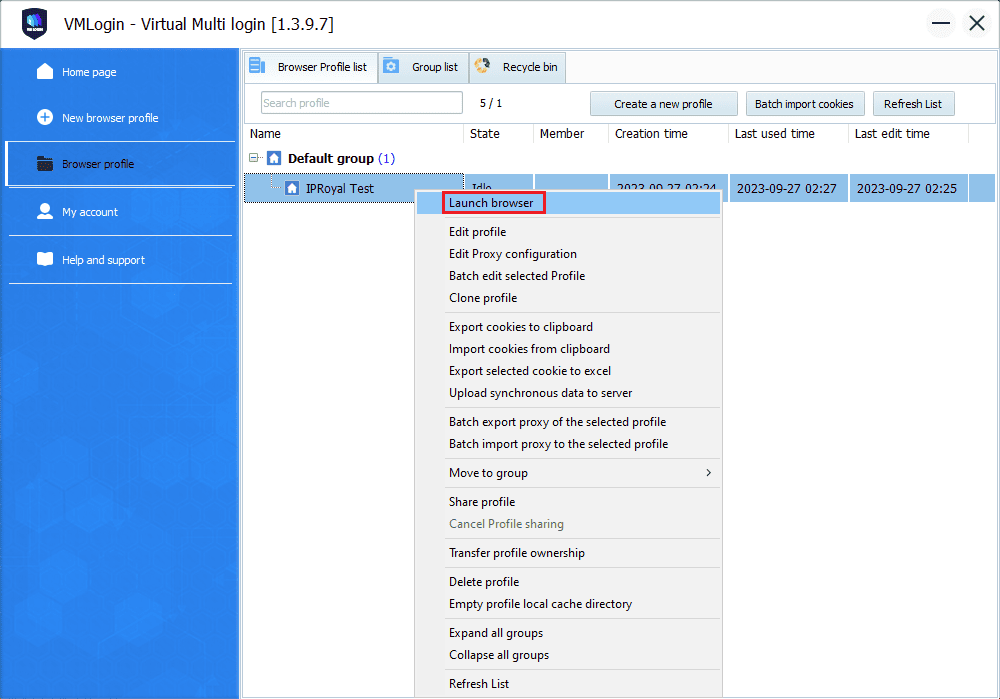
VMLogin’s custom browser window will open, and you can visit our IP lookup page to confirm that your proxies work correctly.
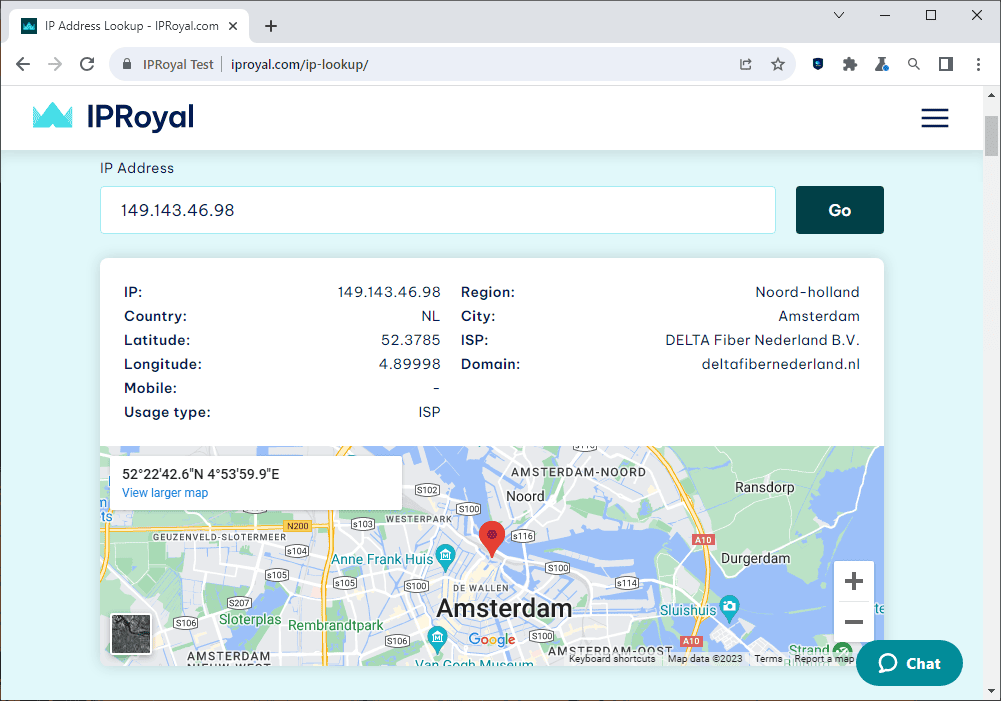
Congratulations, your private browsing can begin!
Final Thoughts
VMLogin’s customization options are among the best we’ve seen so far. While this level of control comes at a price, many users will appreciate the ability to customize all aspects of their browser profiles. Now that you’ve set up your VMLogin browser proxy with IPRoyal, you’re ready to develop your online presence without worrying about bans, blocks, or any other limitations.
Author
Milena Popova
Content Writer
With nine years of writing experience, Milena delivers exceptional content that informs and entertains readers. She is known for her reliability, efficiency, and cooperative nature, making her a valuable team player. Milena’s passion for IT and proxy networks fuels her content creation, ensuring accessibility for all. Outside of work, you’ll find her reading a good book or keeping up with the ever-evolving world of IT.
Learn more about Milena Popova